
Getting Started
So you want to give Keydra a go? Here’s how you deploy it to an AWS account with a starter secret under management.
An AWS account. Don’t have one? Free tier is fine! Go get a free one at https://aws.amazon.com/free!
An Atlassian Bitbucket or a Github account, to host your Keydra configuration. We only support Bitbucket and Github right now, but expect to add other code repository providers in the future.
Create a new private repository, clone it locally, and change to the new directory. See the relevant guide for your preferred platform option:
Create a new directory called
config, and initialise your environments and secrets files. We’ll start with one AWS environment (i.e. account) calledmain, and one sample secret calledsample.
    mkdir config && cd config
    touch environments.yaml secrets.yaml
- Edit
environments.yaml. This file tells Keydra about the AWS account it will deploy to, and which secrets to manage there.
    dev:
      description: Our Development AWS account
      type: aws
      access: dev
      id: <your AWS account ID>
      secrets:
        - sample
For this example, we’ve told Keydra that this account is a
devone, but could also beproductionoruat. Thesampleline tells Keydra to manage that secret in this environment, which we’ll now define! You can add lots of environments (i.e. AWS accounts) to this file, just follow the same format and append.Edit
secrets.yaml. This file tells Keydra about our secrets, just one for the time being - update with your repo organisation or user name, and update theproviderkey to match your code repo type. Note that the repository name here needs to be all lower case.
What is the
custodianskey all about? This is just a free text value that can be used to indicate which person/team is the ‘owner’ of this secret. Can be handy in a larger environment where secrets are not managed by one central team.
    sample:
          key: keydra_managed_sample
          description: A example secret which exists in IAM
          custodians: my_team
          provider: IAM
          rotate: nightly
          config:
            groups:
              - MyDeploymentGroup
            policies:
              - a/path/PolicyName
          distribute:
          -
            config:
              repository: keydraconfiguration
              account_username: <your repo org or user name>
              scope: repository
            envs:
                - dev
            key: AWS_ACCESS_KEY_ID
            provider: <bitbucket OR github>
            source: key
          -
            config:
              repository: keydraconfiguration
              account_username: <your repo org or user name>
              scope: repository
            envs:
                - dev
            key: AWS_SECRET_ACCESS_KEY
            provider: <bitbucket OR github>
            source: secret
- Now push your config up to the repo.
    git add .
    git commit -m "Initial commit"
    git push origin main
What have we setup? This secret will create/manage an IAM user, which we’ll rotate the password every night, and distribute the key and secret as two environment variables in our new code repository. Why would you do this? You could use these credentials in pipelines to deploy code to AWS. Rather than hardcoding these values in your repo, this way Keydra will ensure that they are:
using your least privilege deploy IAM group (
MyDeploymentGroup, which we’ll create soon)are changed (very!) frequently to limit impact if compromised/exposed
are not seen by sneaky humans that can put them onto sticky notes or sell on the dark web!
- On your local machine, clone the Keydra role and install dependencies. Always best to create/activate a Python
virtualenvfirst, but will leave that up to you.
    git clone https://github.com/Athena-Home-Loans/keydra.git
    cd keydra
    pip install -r requirements-dev.txt
    pip install -r src/requirements.txt
Friends don’t let friends use admin for everything!! Login to your AWS account console, and create a new IAM user called
keydra_deploy, with programmatic access only and a policy like that indocs/KeydraDeploy.json.Create an access key for the
keydra_deployuser and stash the AWS_ACCESS_KEY_ID and AWS_SECRET_ACCESS_KEY as enviroment variables in your terminal.Now, we’re going to use
AWS SAM <https://aws.amazon.com/serverless/sam/>_ to deploy two CloudFormation stacks. The first one (keydraExecRole) sets up a least privilege role to run Keydra with. Execute the following on your local machine, changing the region to match your needs.
We’ve added some additional restrictions to this sample role. This requires all Keydra managed secrets in AWS Secrets Manager to be tagged with “managedby: keydra”. If this annoys you, delete lines 52-54 to provide Keydra will perms to all secrets.
    sam build -t docs/KeydraExecRole.yaml
    sam deploy -t docs/KeydraExecRole.yaml --stack-name keydraExecRole --capabilities CAPABILITY_IAM CAPABILITY_AUTO_EXPAND CAPABILITY_NAMED_IAM --region ap-southeast-2
Assuming the SAM run was successful, you should see an outputs block with an Arn for the new role. Note this down, we’ll need this for step 7.
Now we’ll create the second stack, this one for
keydraitself. Copydocs/sample_template.yamlto your main Keydra directory astemplate.yaml. This is a nice SAM template that will make this easy!
cp docs/sample_template.yaml template.yaml
Edit
template.yaml. This looks daunting, but you only need to change the 6 values in angle brackets.IAM Role Arn- This is the ARN to an AWS IAM role that you’ll use to run Keydra, from step 5.repo account name- The code repo account or organisation name from the first section.secrets repo name- The repository name. In this example, this isKeydraConfiguration.path to secrets.yaml- The path to our secrets. For our example, this issrc/main/config/secrets.yamlfor Bitbucket, ormain/config/secrets.yamlfor Github.environments repo name- We’ll use the same repo, useKeydraConfiguration.path to environments.yaml- The path to our environments definition. For our example, this issrc/main/config/environments.yamlfor Bitbucket, ormain/config/environments.yamlfor Github.
Build and deploy with SAM. Make sure Docker is installed/running first!
    sam build --use-container
    sam deploy --stack-name keydra --capabilities CAPABILITY_IAM CAPABILITY_AUTO_EXPAND --region ap-southeast-2
Let’s do an adhoc trial run of the lambda!
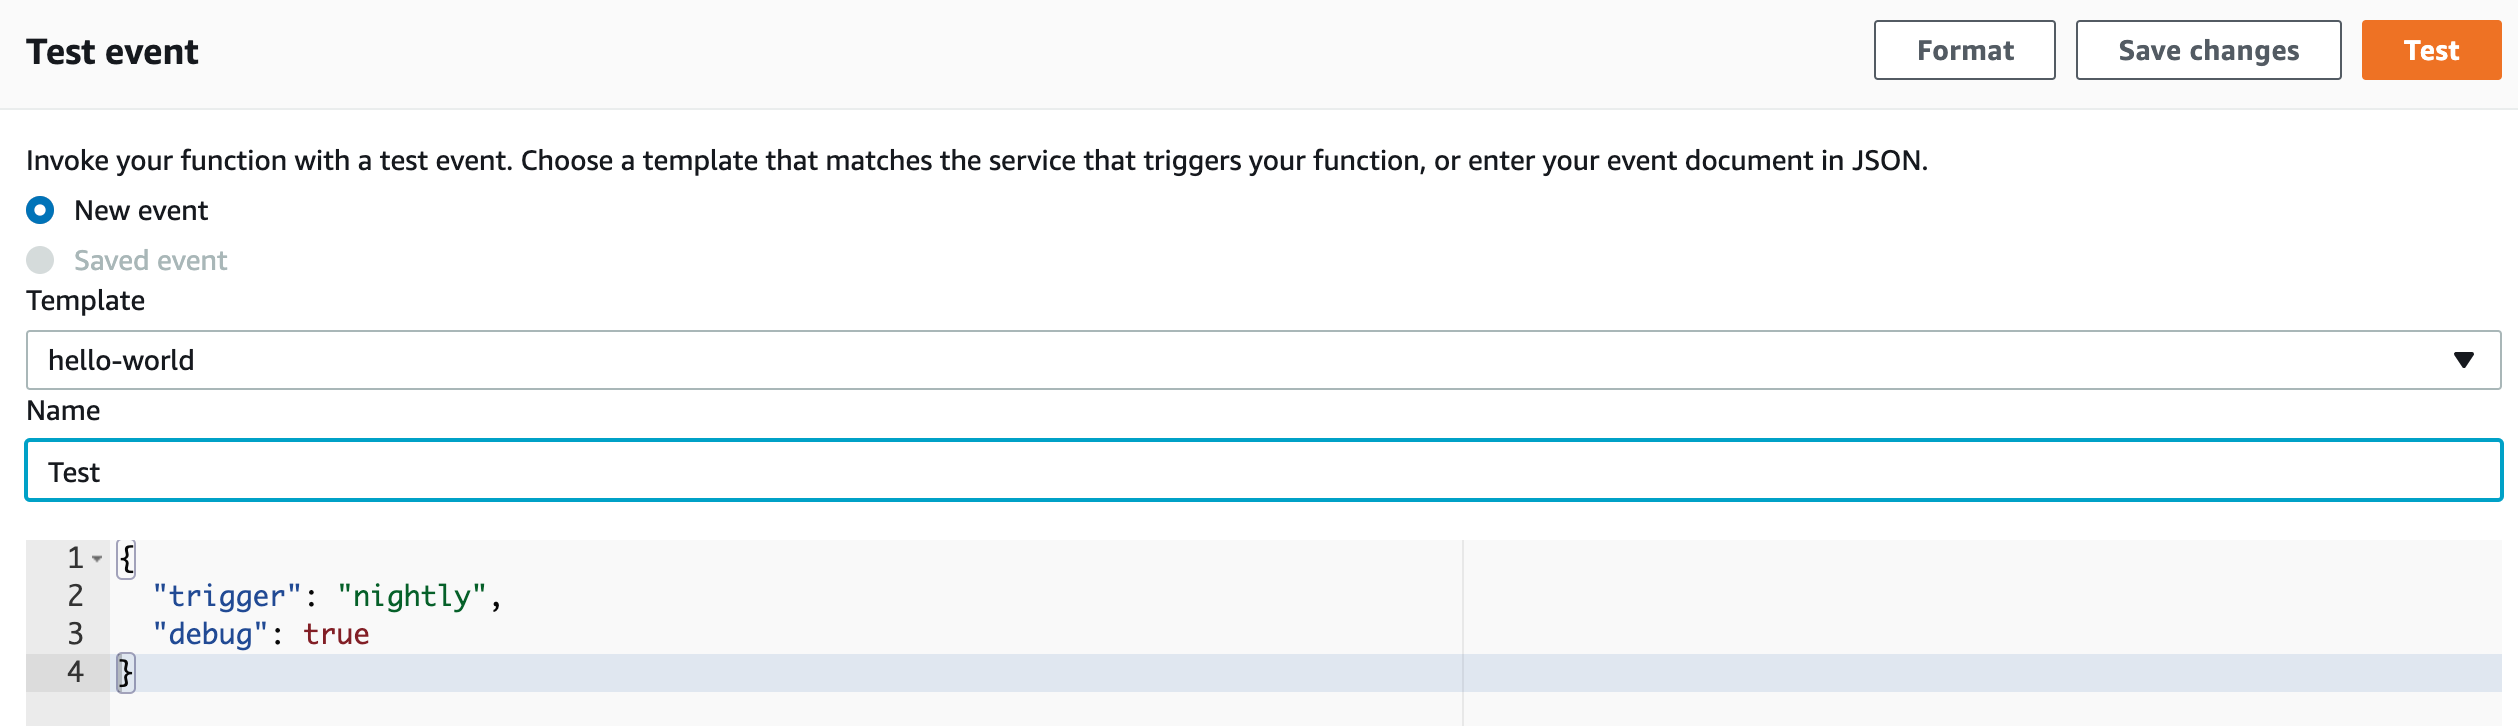
In the AWS Console, navigate to the
Lambdaservice.You should see a
keydrafunction, open it up.Scroll down a little, and select the
Testtab. Test with the following event, which tells Keydra to run aNightlyrun with debug enabled. Click theTestbutton to run Keydra.
    {
    "trigger": "nightly",
    "debug": true
    }
- With a little luck, you should see something like this!
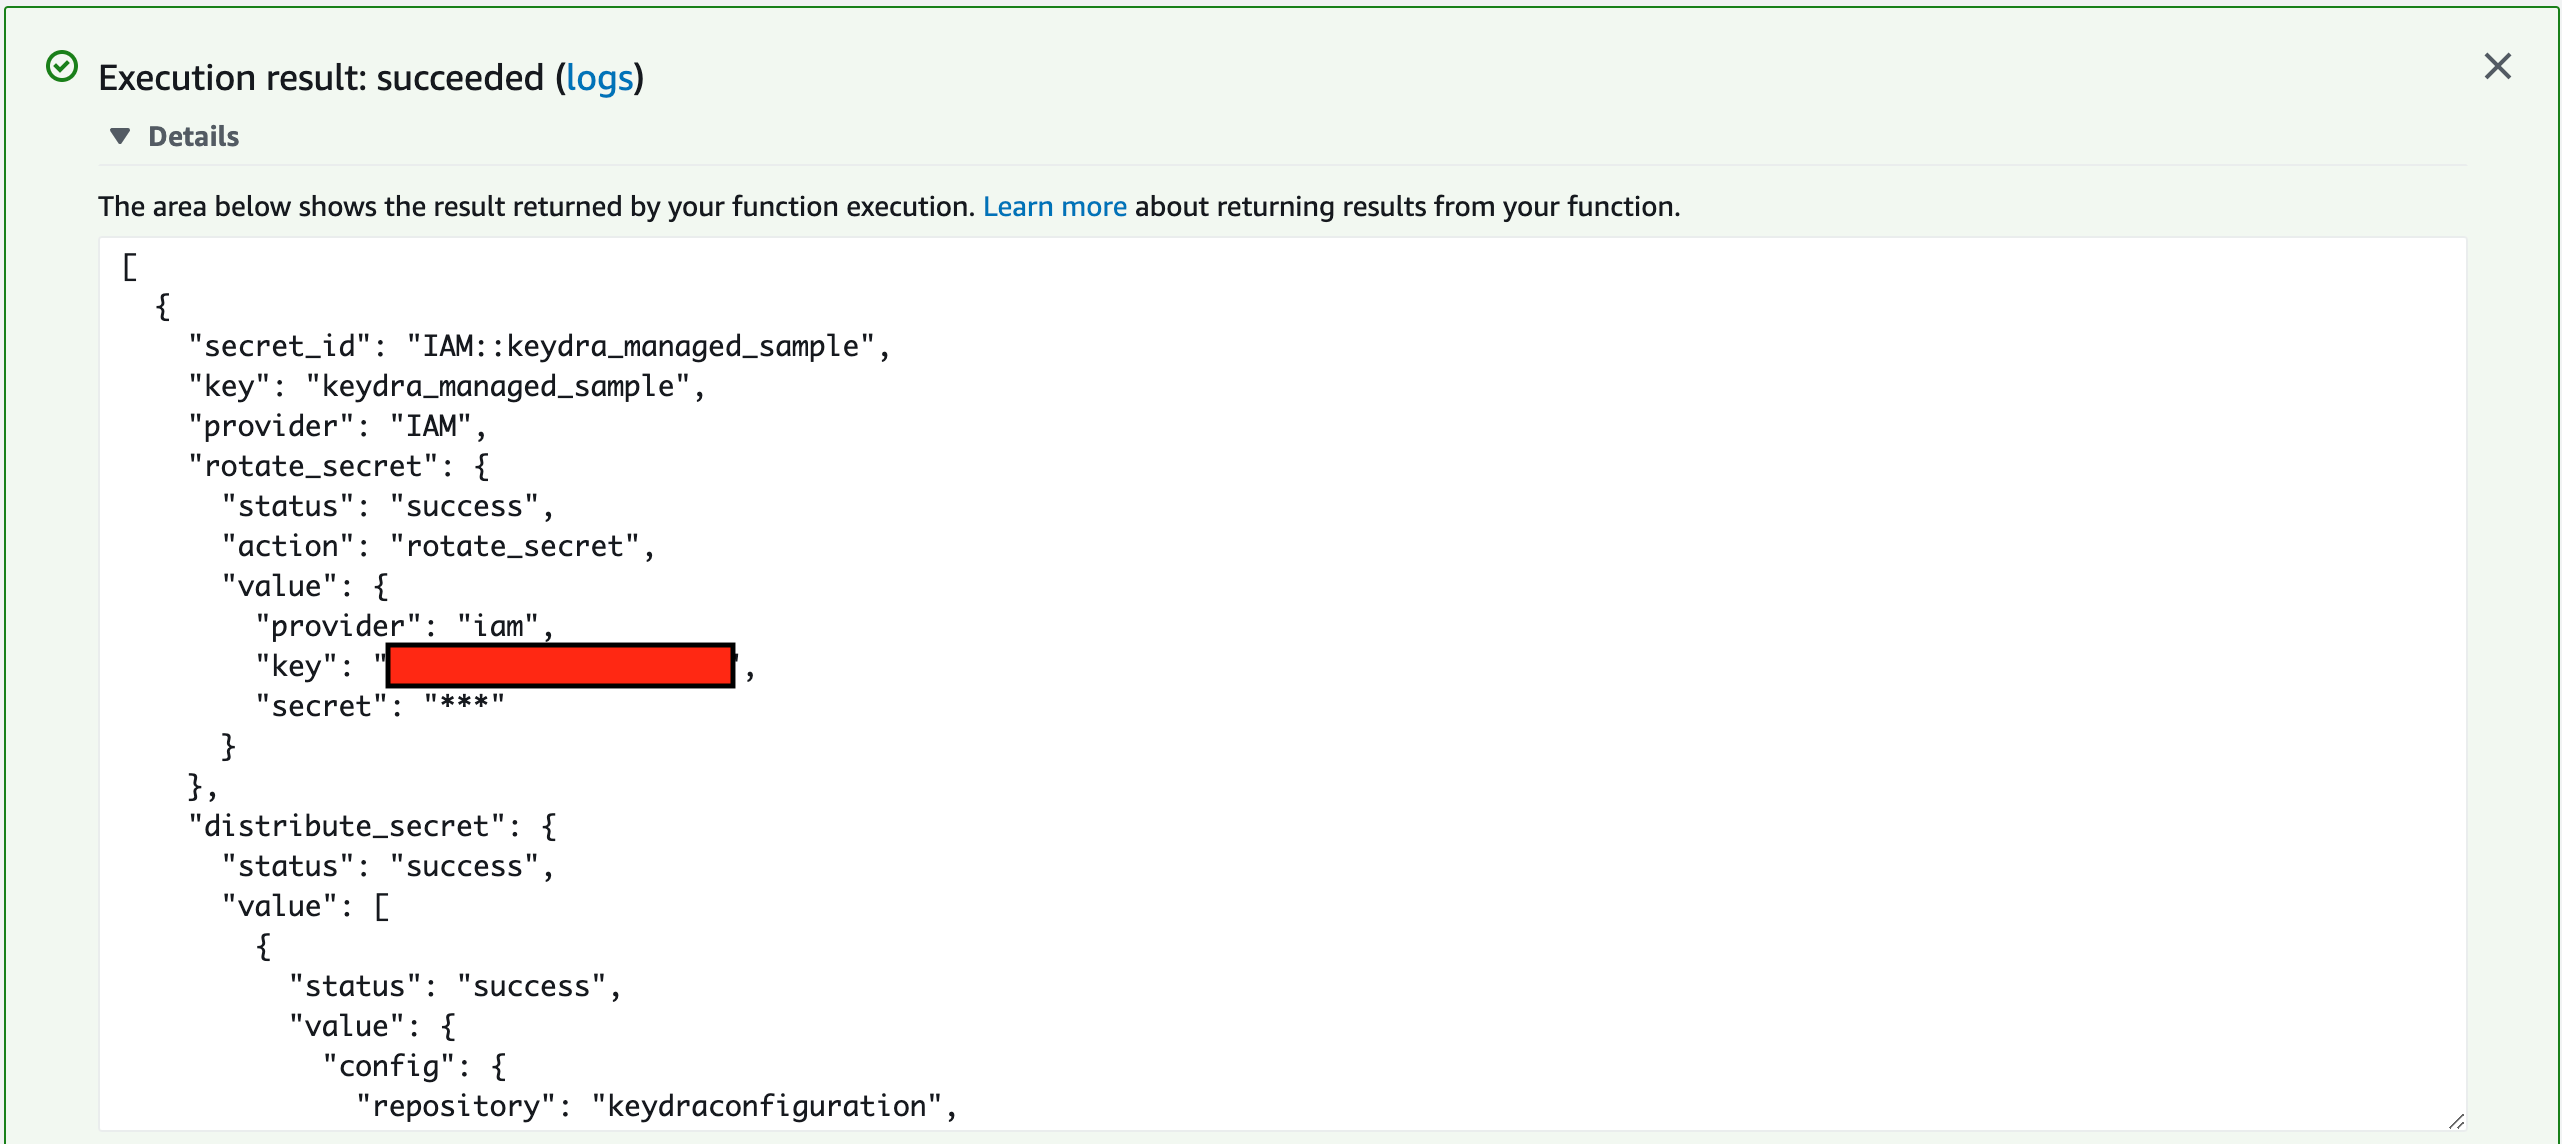
- What just happened? Keydra created an IAM user in AWS, and then stored the IAM username and password in two separate
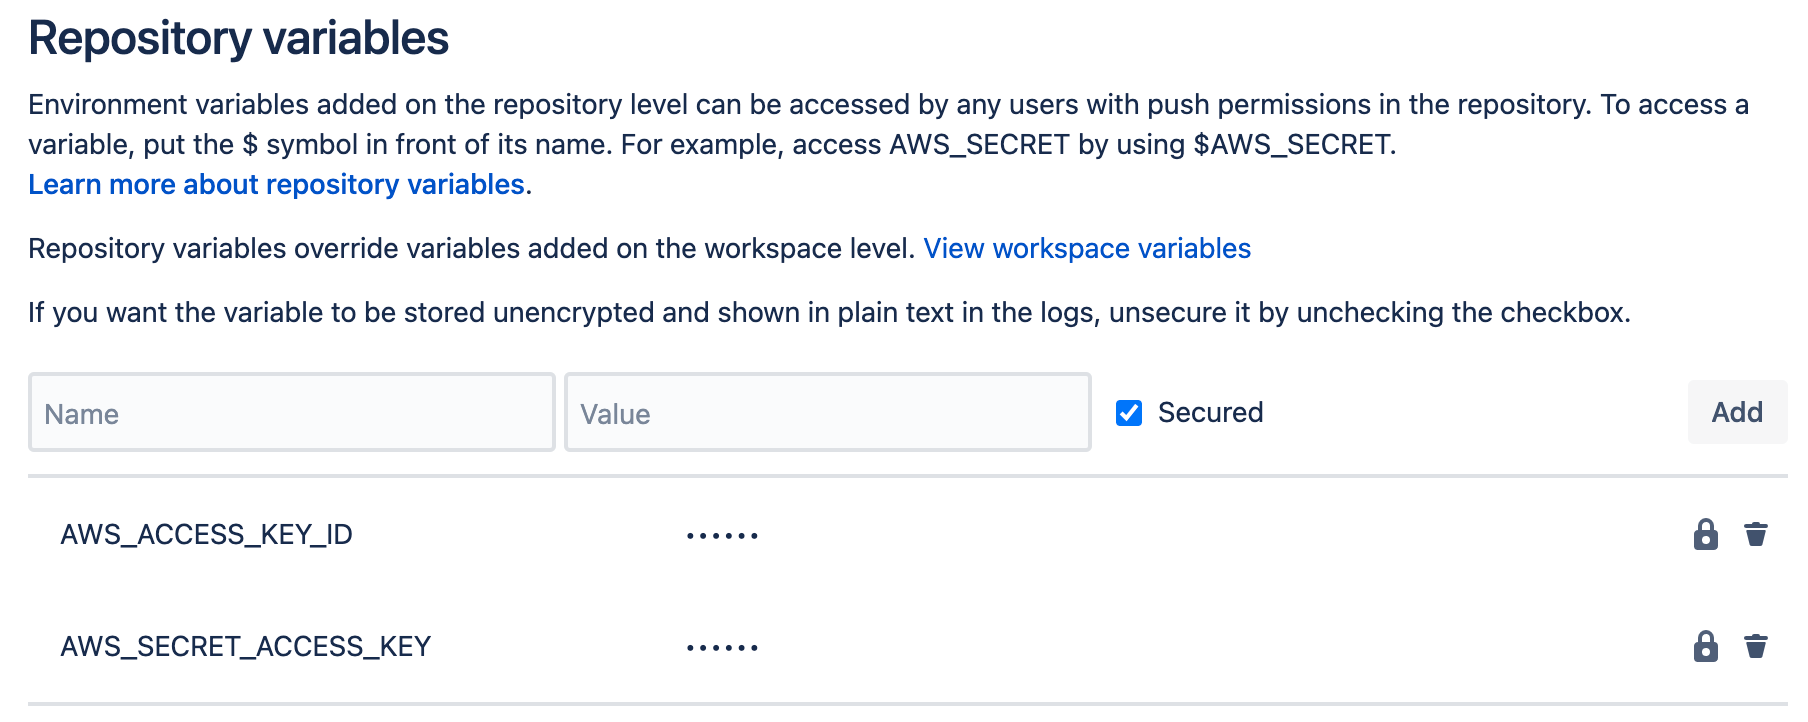
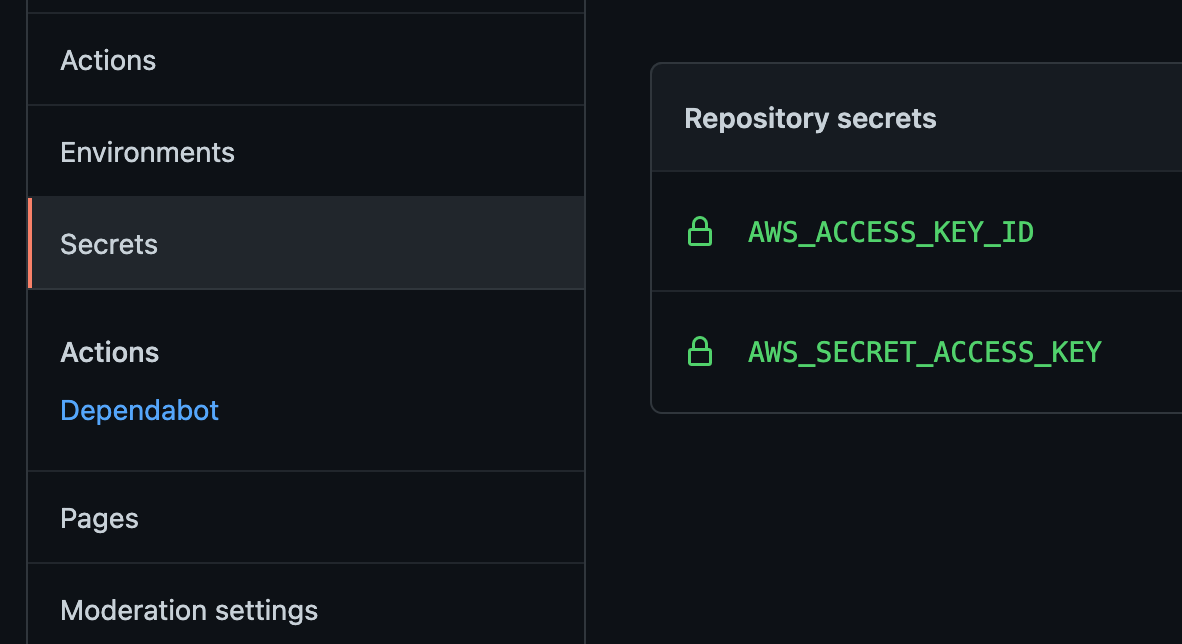
repository variables in your code repository. You can see the results under your repo; browse to
Repository settings>Repository variablesin Bitbucket, orSettings>Secretsin Github.
You can now use these values to deploy your code to AWS, and Keydra will kindly rotate them automagically every night, without you needing to do a thing!